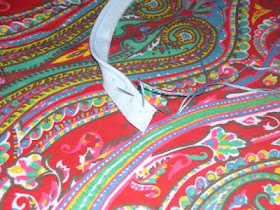
First, start with your bias binding. You can buy it or make it. Just make sure if you are using it to go around corners, you cut it on the bias. The first picture shows my binding after cutting and pressing. The second picture is with the cording already inside the piping. If you need more information on this process, please shoot me an email.
Then thread your needle with your floss. DO NOT KNOT THE FLOSS. Leave a tail on the end of your floss. This eliminates the bulk in the bias when you stitch it to your project. You don't want your machine needle hitting the knot. Once you sew it to your project, the machine will stitch it in place. You want your floss long enough to run the length of your bias. If the piping is super long, you can do it in sections. My piping was only 24" long, so I used only one piece of 6 strand floss. Bring your needle up on one end of the piping at the first marked dot as shown below.
Notice that my marks are well below the stitch line. Once you press these marks, they become permanent. I wanted them hidden. So I brought my needle up on the stitch line just above the mark. Take your needle to the opposite side and bring it up just above the next mark right on the stitch line as shown. You are basically just wrapping your piping with your floss. Continue until you reach the end of your piping. Go very slow if you are working with a long piece of floss. It will get tangled very quickly otherwise. Stop a few times and allow your needle to unwind to keep your floss as smooth as possible.
This is what it should look like once you've sewn on your floss.
DO NOT TIE OFF AT THE END. Again, you do not want that knot in your piping. If you need to secure, place a piece of tape on the ends to secure until you are ready to attach to your project. Once you sew this onto your project, the stitching will catch the floss to secure it.
This is my project. I'll have the tutorial on that tomorrow with a way to join the piping without overlapping, so it looks seamless.
The embroidery is from Kim's Shhh......Baby's Sleeping Pattern Packet over at bigB. You can find it here.
My first attempt at whipped piping was with this same pillow. It did not turn out the way I wanted. It looks more shell like than whipped. But I do like it and will use again. Here is the pic.
Happy sewing!
Angela


Angela, my grandmother always took her skein of pearl cotton or embroidery floss, took the little paper off, and as is, held it under hot water to see if it bled. she laid it down as is to dry. Then she used it.f Red usually always runs, I don't know why. It fades the most in the sun, too. I made a real pretty project with doilies and lace seam tape to make Grandmother's Flower Garden. I embroidered over it in different colors, just random stitches that I liked. It looked like a flowerbed when I was done. I have a computer sewing machine but I like handwork. We don't have a camera, the batteries exploded in it, $ Canon ancient, 1.5 mp. or I wld take a pic if I knew where I stored it. HA. Vicki K
ReplyDeleteThanks Vicki. I'll try that. It's the first time I've used silk floss. I've used red DMC on other stuff I've smocked and never had that problem. If you find someone else with a camera, I'd love to see your doily project.
ReplyDeleteThank you Toodie. I saw this on a backpack in a magazine and wanted to duplicate it.
ReplyDelete