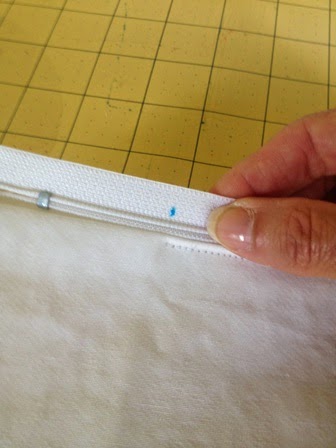
As promised, here is the tute for installing a zipper in a flanged pillow cover. I looked everywhere on how to do this and came up with squat! Then I remember that I had some pillow shams on my bed that had been professionally done years ago. They had ruffled edges, but I knew I could use the same principle. But I still didn't quite know how to do it. So I thought I'd use the same basic rules for a lapped zipper.
First thing is to decide where you want your zipper. I decided to put mine in the side since this pillow was 48" long. This way you can slide the pillow in from the side making it easier to insert. But the same method can be used for a bottom placement.
Cut your back pieces. I chose to cut the first back piece the same size as the front, because I wasn't sure how much I would need extra for the "lap". I trimmed off the excess once I completed the back pieces. Cut a smaller piece for the under side of the "lap". My flange is 2", and I would need 1/2" seam allowance for both the flange side (the outside edge of the pillow) and the zip side. I wanted that zipper about 1" in from the stitch line of the flange. I made my smaller piece 4" wide 2" flange + 1" seam allowance + 1" from the bottom = 4". Make it wider if you need to depending on your seam allowances and the size of your flange and how far up from the flange you want to place it.
Serge the sides of both pieces where the zipper will be installed.
Attach one side of your zipper to the smaller piece. Make sure you measure in 3" from each side to leave room for your flanges. This will be your start and stop points.
Place one side of the zipper right side down to the right side of the first piece and stitch starting and stopping at those marks. Transfer those same marks on your zipper for the next part.
Flip this over and press really well being careful to avoid the zipper teeth. Some zippers will melt. Topstitch down the zipper. Remember to start and stop at the same place. Give it a good pressing.
To attach the other side of the zipper, close the zipper and transfer the marks to the other side.
Measure in 3" on the other piece just like the first piece.
I use a little wonder tape on this side to keep everything in place when stitching.
Remove the paper from the wonder tape and lay the right side of the zipper to the large back piece. Line up the raw edges and press down firmly to seal that tape. Stitch in place.
Flip it over and it should look like this.
It's time to form the lap. I folded the side that is not topstitched over until the fold met the edge of the zipper tape on the other side that is topstitched. You can just see it through the fabric below. See the arrow.And if you prefer to measure, it's about 3/4". Be sure to press that fold. If you want to pin it in place, do it now. Because this fabric really pressed well, I didn't need the pins. But pin away if you prefer. Just don't pin it to the other side.
Now unzip the zipper.
You can choose to stitch it down following the same stitch line as when you attached the zipper tape,
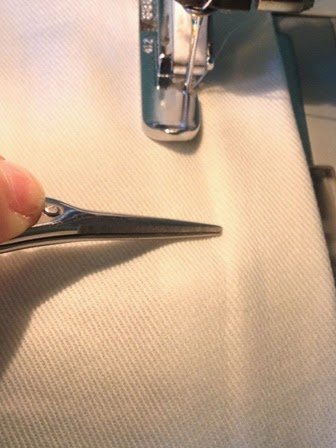
Or simply turn it over and stitch it down on the right side using the zipper tape underneath as a guide. My bobbin thread doesn't make a pretty topstitch, so I chose the latter. See the groove where my scissors are pointing? Just run it along that edge. Using a narrow zipper foot helps.
Stitch the ends closed. Don't worry about getting super close to the zipper, you won't see it anyway. We'll fix that in the next step. You just want it close.
See?
Do the same for the other side.
And it looks like this. Give it another good pressing.
Line up both pieces right sides together and even up the edges. I had to cut a little off the side with the zipper. You can also do the dog ear adjustment at this time. Here is a great tute on this adjustment. Once they are all neat and tidy, stitch those puppies together. ***Remember to open your zipper so you can turn it right side out.***
and turn right side out. Press the whole case really well.
Stitching the flanges. Rather than make marks in this beautiful corduroy fabric, I measured 2" over on my machine and taped a piece of brown paper tape. I used this as my guide. You can also use painter's tape.
Line the fabric up with the edge of the tape.
Look at that nice straight edge.
And the other side.
And this is your lapped zipper. Stand back now and marvel at how wonderful it is.
You can see the flange stitch line a little better in this picture. It is just about an 1" from the zipper.
I forgot to take pictures of the last step, and that is to close the last part of the zipper. I used to do it another way, but this way is easier. Trust me.
This is a different pillow but the same method. See that hole left in the fabric from the end of the zipper to the end of the pillow? That need to be closed.
Here is another view.
I slip stitch that closed. It can be done before or after you stitch the flange.
And after all the stitches are in. Repeat for the other side.
And now you know how to install a lapped zipper in a flanged pillow. No more envelope closures for you or me! I hope this helps you!
If I haven't made something clear, please feel free to email me with questions.
Next up is a super easy trick I've learned to get perfectly pressed seams on these pillows without all the fidgeting of rolling the seam and burning your little fingers. Stay tuned. You'll love how easy it is. And you probably already have what you need to make it happen.
Angela


0 comments:
Post a Comment