
Today's tute will be on the actual attaching part. You'll need to have your quilt completely finished at this stage. The first thing I did was to make a button hole right in the center of the circle part of your dresden plate. Obviously you'll need your button first. I chose a 1 1/2" button so my button hole is rather large.

Then you'll place your dresden on your quilt where you want it (I chose the very center) and mark the place for your button hole and stitch it on. Then button your dresden to the quilt.


Now start stitching a snap onto every point on the dresden. BE VERY CAREFUL IN WHICH SNAP YOU PUT ON YOUR BLADE. Make sure it is the right side. I stitched all 20 on my dresden before I realized they were on the wrong side! Get them pretty close to the edge. Start on one side and do 3 or 4 blades, then go across on the opposite side and do 3 or 4 there. This ensures you get a snug fit with no gaps. When those are finished, move on to another 3 or 4, then do the opposite side. Keep going until they are all stitched on. Keep the dresden buttoned through the whole process.


Once you have all the snaps on the top, you'll stitch the bottoms on. If you have your own way of matching the snaps, then use it. If not, this is how I matched mine. I used a white pencil and scratched it over the tip of the snap on the dresden.

You can see the white on the tip.

Then pressed it into the quilt. See that little white dot?
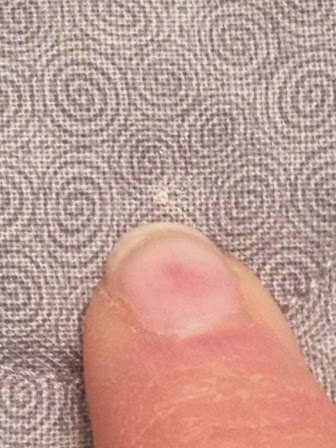
Place the snap over that white dot and stitch it on. Once you get the first one, snap it down before you mark the next one. Then snap that one down before you mark another, and so on. They will look like this. I unsnapped so you could see. I also unsnapped to stitch them on to get the plate out of the way.

Snap them all down.


I hope you found this information helpful. If I didn't make anything clear, please feel free to comment or email me.
Angela
Thanks for your time and effort in giving step by step process to this Dresden plate quilt. My father passed away and I am (hopefully) making this for my 2 brothers and 2 sisters. He was a minister and I found this to be something he would have wanted me to do. God bless you.
ReplyDeleteI am so very sorry for your loss. I am also happy I could help. Please feel free to email me if you have questions. You'll find my contact information at the top of the page. Good luck with your quilt, and I would love to see it when it's complete. You'll see your father again one day, but until then I pray for peace and comfort as you mourn your loss.
DeleteThank you so much for this tutorial. It is so helpful.
ReplyDeleteDid you take your quilt out to have it quilted or did you do that yourself?
I'm glad it helped Linda. I took it to someone to quilt.
Delete