This is the pair of shorts I mentioned in my last post. This is a Butterwick pattern, vintage I believe, 6025. And I must say, the instructions were quite easy to follow, mostly. The only place I got a bit hung up was on the tabbed front close which I wound up not using.
Now without further ado, how exactly do you match plaids?
First, lay out your pressed fabric in a single layer and pin one of the pieces (front or back) to the fabric. I used the back. Make certain you line up your grain line with one of the plaid stripes. I drew my line on the pattern all the way to one end to simplify this step.
Then I raised the pattern up on the other side to be sure I was on the same stripe. My eyes went a little buggy doing this.
I also stuck a pin right at that mark in the middle of my pattern to keep it from sliding.
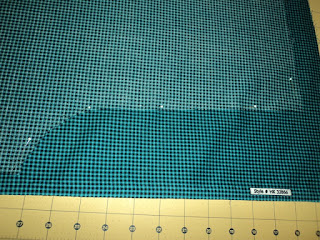
And this is the cut piece.
Now unpin the pattern from the fabric, and use the fabric piece you just cut to cut out the other half of the back. ***Make sure you flip the fabric piece over.** Otherwise, you'll have 2 pieces of the back right.
Start on one corner and match up the plaids. Match them both vertically and horizontally.
Then pin the other corner and down the side in between.
This is the other side. Try to match the curves as closely as possible. They may be just a smidge off.
Once you have it all lined up and pinned, cut it out.
Now take your front pattern piece and lay it on top of one of your back pattern pieces just like they would go together when stitching. Match up the notches. Notches are very important here.
Now, right on your pattern piece, mark your darker stripes both vertically and horizontally in multiple places on the pattern.
I slid this one down a bit so you could see.
Here you can see my marks all down that one side where the side seam will be. Make sure you mark the lines around your notches really well. I didn't get a pic of this.
Now take that pattern piece and line it up on your fabric lining up the marks you made with the plaid in the fabric. I don't know why I don't have a pic of that step. Cut that piece out, flip it over to cut out the second one.
Now for my side front piece. Take that pattern piece and again line it up with the back piece where it will be sewn together. Mark your lines just like you did before. In this pic, you can see where my fold line is, so I want that pattern piece right at the fold line.
Here are my marks at the corner. Just mark these in several places down that side. Do NOT cut the waistband pattern piece out yet.
Now I will begin attaching my pieces. This is my front seam below the zipper. Just ignore that little white thread. That is gone now!
Next I attached my pocket to my front side, because it will be pressed in and won't show. Then I attached my side front to my front. See the plaids match!
This is my back seam after stitching the two back pieces together.
This is how I attached my waistband to get it to match almost perfectly. There is only a waistband on the front in this pattern. Remember our waistband hasn't been cut yet. Take your pattern piece and line it up at the top of the waistline and mark your plaids just like you did earlier.
This is vertically and horizontally. This is the only picture that turned out, but it's the same as the other pieces. Mark in in several places across the top. Take the pattern piece and lay it on your fabric matching your lines to the plaid in the fabric. Now cut it out.
And this is what it looks like once you stitch it on the pants. Nearly perfect. Just make sure to match the notches and the plaids when you pin them together. My vertical seams are off a bit. I imagine I didn't get them quite lined up when I marked them. Also, right where my pleats fall (middle), they didn't line up exact. But they are close.
And this is the side view showing the side seam (front to back), side front and waistband.
And a close up of the other side.
Just in summary. The most important part of this process is matching your notches and lining up your pattern correctly where it will attach and drawing your lines correctly placed. Be sure to mark your lines all around your notches.
Happy Thursday!
Angela


0 comments:
Post a Comment